Door Seal Kit Installation Video
If you’re tackling door seal installation to improve room acoustics, the goal is simple: eliminate air gaps under and around a door so sound can’t pass from one room to another. Even a solid-core soundproof door can leak an amazing amount of sound if there’s a visible door gap along the sides, top, or bottom. This step-by-step guide walks you through installing an acoustic door seal kit correctly, from measuring and cutting to final adjustments for maximum STC improvement and long-term performance.
Tools & Materials Needed
Before starting, gather the following:
- Tape measure
- Pencil and notepad
- Miter saw or hacksaw with a fine-tooth blade
- Drill and drill bits
- Screwdriver
- Eye protection
- Sharp scissors
- Spacers (cardboard or shims)
- Caulk gun
- Soundproofing sealant (acoustic caulk)
- Neoprene gasket tape (if needed for minor gaps)
Having everything ready will streamline the installation and reduce errors.
The Door Seal Kit Installation video shows how to easily improve your room’s sound isolation.
Step 1: Measure the Door Frame Accurately
Every successful door seal installation starts with precise measurements. Begin with the hinge-side jamb, measuring from the threshold up to the inside of the upper doorstop. Repeat on the latch side. Write these dimensions down.
Accuracy matters because improperly sized seals lead to binding, uneven compression, or persistent sound leaks. Follow the rule: measure twice, cut once. Replacing aluminum channels due to a rushed cut adds time and expense.
If the door alignment is off, correct it before proceeding. A misaligned door can compromise the performance of even the best perimeter door gasket.
Step 2: Cut and Install the Side Jamb Seals
Mark your cutting line perpendicular to the aluminum channel – not the rubber gasket. Place the rubber side against the saw backstop and confirm the blade is set to a 90-degree cut.
Cut slowly and wear eye protection. The trimmed end piece can eject during cutting.
After cutting, pull the rubber gasket back into the channel if needed. Install the hinge-side seal first, placing the cut end down against the doorstop. Check that the door opens and closes without binding.
Drill the center mounting hole first, insert the screw, then secure the remaining holes. Repeat this process on the latch side.
These side seals form the foundation of your perimeter door gasket system and are essential for sealing a door properly.
Step 3: Measure and Install the Top Seal
Measure the distance between the installed side seals. The top seal should fit tightly between them for clean gasket corners and a continuous seal line.
Cut carefully, drill pilot holes, and secure the seal in place. Make sure the corners meet snugly without leaving micro-gaps where sound leaks could occur.
If minor irregularities exist in the frame, apply a thin bead of soundproofing sealant (acoustic caulk) behind the channel before fastening. Use a caulk gun for even application.
Step 4: Adjust the Perimeter Gaskets
Once installed, the seals need adjustment. Close the door and use a sheet of paper to test compression.
The gasket should grip the paper firmly but allow removal without tearing. If it’s too loose, soundproofing performance drops. If it’s too tight, the door may bind.
Turn the adjusting screws counterclockwise to push the gasket toward the door. Make incremental adjustments until the door operates smoothly with even compression across the entire perimeter.
Proper compression is what transforms basic weatherstripping into a true acoustic seal capable of measurable STC improvement.
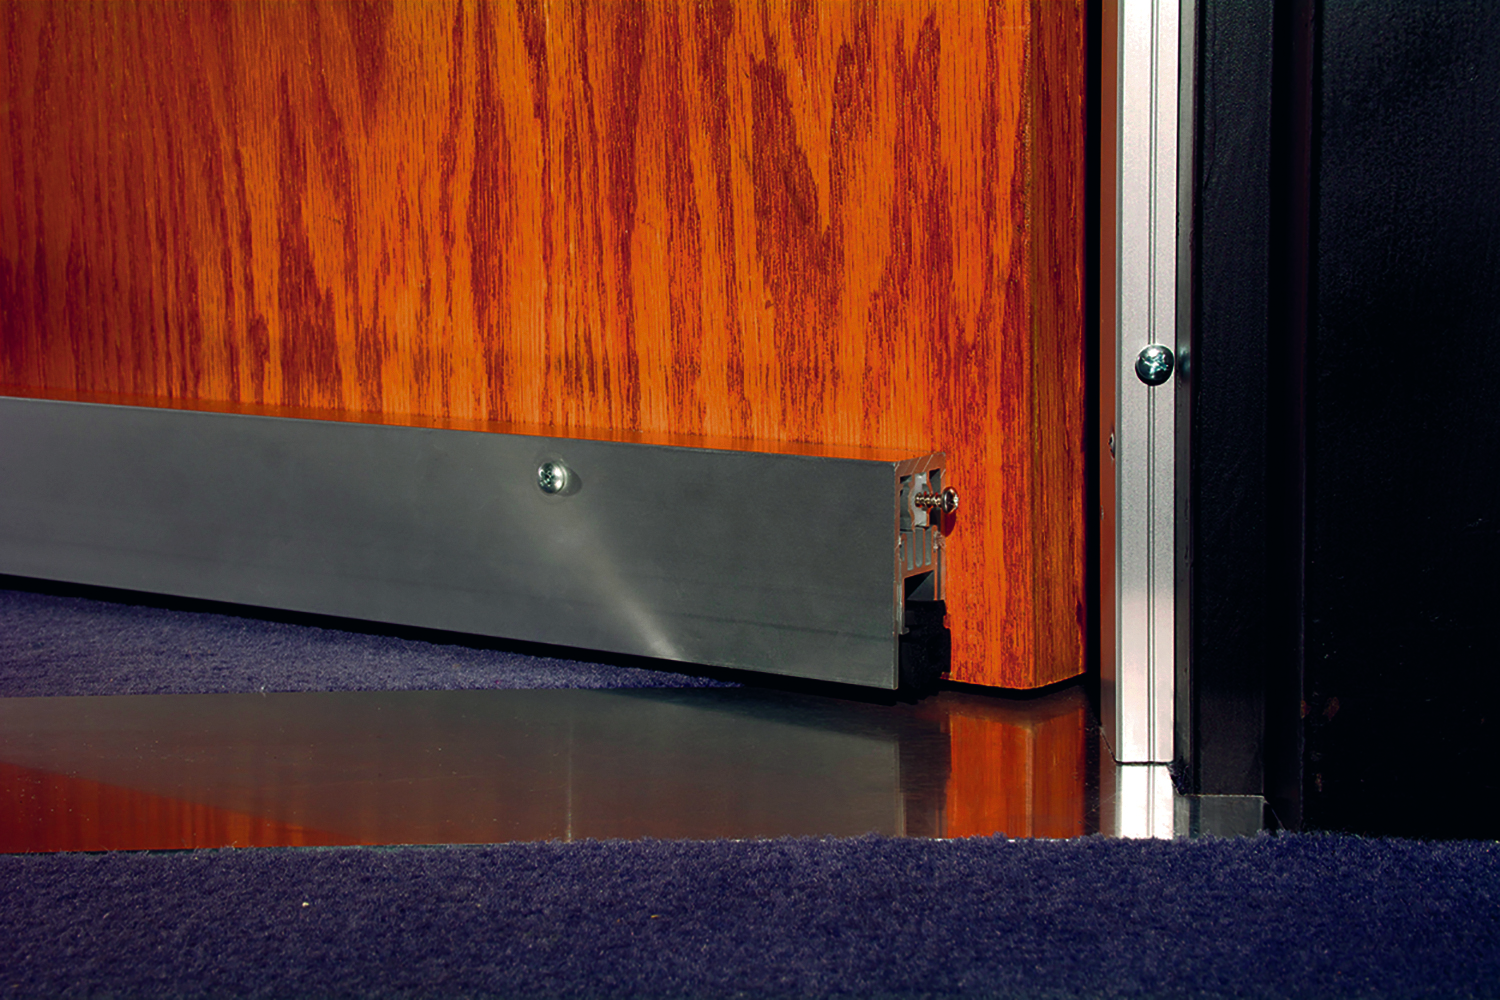
Step 5: Measure and Cut the Automatic Door Bottom
Now measure between the inside edges of the jamb seals to determine the correct length for the automatic door bottom.
Mark the cutting line on the end opposite the actuator screw. Pull the rubber gasket back slightly before cutting the aluminum channel to avoid damaging it.
After cutting, trim the rubber gasket with sharp scissors so it extends about ⅛ inch beyond the channel. Keep cuts straight and square.
Install the actuator screw on the hinge side of the door. This positioning ensures correct engagement when the door closes.
Step 6: Install and Level the Automatic Bottom Seal
Before fastening, confirm proper threshold fit. The bottom seal must clear the floor covering and sit level.
Use spacers on both sides to hold the automatic door bottom at the correct height. With the actuator on the hinge side, center the seal and begin fastening from the middle outward.
Avoid overtightening screws. Over-compression can prevent the mechanism from dropping evenly.
Close the door and adjust the actuator screw until the gasket drops fully to the threshold when shut. Use a strong light source to check for visible door gap areas.
This component is often the most important upgrade when comparing a door sweep vs automatic door bottom. Unlike a fixed sweep, an automatic bottom retracts when the door opens and drops when closed, providing better sealing and longer-lasting performance.
Step 7: Seal Minor Gaps and Final Touches
After installation, inspect the entire assembly.
If small cracks remain around the frame, apply soundproofing sealant (acoustic caulk) to seal them permanently. For minor compression adjustments, neoprene gasket tape can fine-tune tight spots.
Check that all gasket corners are tight and continuous. When properly installed, your acoustic door seal kit eliminates air pathways, significantly reducing sound leaks and improving overall soundproofing performance.
FAQ
What’s the difference between self-adhesive vs screw-on door seals?
Self-adhesive seals are easier to install but typically provide lighter-duty performance. Screw-on door seals – like those in a professional acoustic door seal kit – offer stronger compression, better durability, and more reliable STC improvement over time.
Is this the same as basic weatherstripping?
No. Standard weatherstripping is designed for air and temperature control. Acoustic seals are engineered for higher compression and consistent contact, which is essential for serious soundproofing.
How much improvement can I expect?
While results vary based on wall construction and door type, properly sealing a door can dramatically reduce sound leaks. In many cases, upgrading perimeter seals and adding an automatic door bottom yields noticeable STC improvement, especially in offices, studios, and conference rooms.
When completed correctly, door seal installation transforms a standard solid-core door into an effective acoustic barrier. By carefully measuring, installing, adjusting, and sealing every gap, you create a continuous compression seal that blocks air movement – the primary pathway for unwanted sound transmission.


About author