Acoustic Panel Install Video
Clear sound inside a room depends on controlling reflections from walls and ceilings. Hard surfaces reflect sound energy, increasing reverberation and reducing clarity. Installing sound-absorbing panels is one of the most effective ways to improve speech intelligibility, music playback, and overall comfort in a space.
When done correctly, acoustic panel installation reduces excessive reflections, shortens RT60 (reverberation time), and delivers meaningful reverb time reduction. This step-by-step guide explains how to prepare your panels, measure mounting locations, and securely install them using Z-clips so the finished system looks clean and performs as intended.
Tools & Materials Needed
One of the advantages of installing acoustic panels yourself is how simple the process can be. In most cases, there are only a few basic installation tools needed.
You’ll typically need:
- Mounting kit with Z-clips
- Drill or screwdriver
- Level
- Measuring tape
- Painter’s tape
- Pencil or marker
Depending on the installation method, additional hardware such as a french cleat, impaling clips, or spray adhesive may be used for certain panel mounting applications. These options provide flexibility when hanging acoustic panels on different surfaces.
Step 1: Prepare the Panel and Install Z-Clips
Start by placing the acoustic panel face down on a clean, flat work surface to avoid damaging the fabric.
Locate the metal mounting plates on the back of the panel. Using the included screws, attach the Z-clips directly to these plates.
Install the screws carefully. Avoid using an impact driver because the self-tapping screws can strip the metal plate if too much force is applied. Drive the screws slowly and finish tightening with a hand screwdriver if needed.
Once all Z-clips are attached to the panel, move on to measuring the wall mounting points.
Step 2: Measure Clip Spacing on the Panel
Accurate measurement is essential for successful panel mounting. The goal is to transfer the exact clip spacing from the panel to the wall so the panel hangs straight and level.
Insert two spare or “blank” Z-clips into the top and bottom clips on one side of the panel. Measure the distance between the bottom edges of those two clips.
Add 2⅛ inches to this measurement and write it down. This will become your top-to-bottom clip distance when marking the wall.
Next, insert blank clips into the top two panel clips. Using a straight edge, draw a line even with the bottom edge of the blank clips. Then measure the distance between those clips and mark the center point.
Write down this center-to-side clip distance, as you will use it when laying out the wall mounting locations.
Step 3: Mark the Wall Center Line
To keep the panel visually aligned, start by marking the panel’s center location on the wall using painter’s tape.
Measure upward from the floor to find the vertical center point where the panel will hang. Place a piece of tape on that location so it remains visible while marking measurements.
Next, measure down from the top edge of the panel to locate the panel’s horizontal center line. Record the distance between that center line and the bottom edge of the blank clip reference line you drew earlier. This becomes the center-to-top clip distance used in the next step.
These measurements act as a measuring tape layout template, helping ensure the wall clips align perfectly with the clips mounted on the panel.
Step 4: Install the Top Wall Clips
Place the bottom corner of your vertical level on the center mark on the wall and draw a vertical center line using painter’s tape as a guide.
From that center point, measure upward using the center-to-top clip distance you recorded earlier. This becomes the top clip mounting line.
Now place the level horizontally across this line to ensure it is perfectly level. Mark two reference lines for the clip locations using the center-to-side clip distance measurement. These marks indicate where the wall clips will be installed.
Place a blank clip on each reference line and mark the anchor locations through the clip slots.
Use the tip of a screw or nail to create a small indentation at each anchor mark. This helps guide the wall anchors during installation.
Slowly screw the wall anchors into place, making sure not to overtighten them. Once the anchors are installed, secure the wall Z-clips using the long mounting screws included in the kit.
Step 5: Install the Bottom Wall Clips
With the top clips installed, you can now mark the lower mounting points.
Remember the top-to-bottom clip distance measurement you recorded earlier. Measure that distance straight down from the installed top clips and mark the bottom clip line.
Repeat the same mounting process used for the top clips:
- Draw a vertical center line using the level
- Measure the center-to-side clip distance
- Mark two reference lines for the bottom clips
Install the wall anchors and attach the bottom Z-clips just as you did for the upper clips.
Once finished, remove the painter’s tape and confirm all four clips are level and aligned.
Step 6: Hang the Acoustic Panel
Lift the panel and align the panel-mounted Z-clips with the wall clips. Carefully lower the panel until the clips interlock securely.
When installed correctly, the panel will sit flush against the wall and remain firmly supported by the mounting hardware.
This installation method works for most standard wall-mounted acoustic treatment panels.
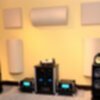
Step 7: Optimize Panel Placement for Best Results
While installing panels correctly is important, panel placement is just as important for acoustic performance.
Many rooms benefit from placing panels at first reflection points, which are the locations where sound reflects off nearby surfaces before reaching listeners.
Panels can also help with flutter echo treatment by breaking up sound reflections between parallel walls.
Spacing panels evenly across walls improves panel spacing for echo control and more consistent reverb time reduction across the room.
For rooms with stronger low-frequency buildup, bass trap corner mounting may be necessary. In larger spaces, panels may even be suspended from the ceiling using ceiling suspension systems.
Together, these approaches create balanced acoustic treatment that reduces reverberation and improves clarity.
FAQ
What’s the difference between fiberglass vs foam acoustic panels?
Fiberglass panels typically provide broader absorption and better performance across mid and low frequencies. Foam panels can help with higher-frequency reflections but usually offer less overall absorption. For most rooms, fiberglass panels deliver stronger RT60 improvements.
Can acoustic panels be installed without Z-clips?
Yes. Some installations use impaling clips, spray adhesive, or a french cleat system. However, Z-clips remain one of the most common methods because they provide secure mounting while allowing panels to be easily removed if needed.
Do acoustic panels need adhesive?
Not always. Mechanical mounting systems like Z-clips and french cleats don’t require adhesives. If adhesive is used in your acoustic panel installation, be mindful of adhesive curing time considerations before moving or adjusting the panel.