Soundproofing a Home Recording Studio: DIY Guide for Musicians & Creators
Home studio soundproofing is a crucial step for musicians, podcasters, and content creators aiming to produce high-quality audio without unwanted distractions. Whether you’re recording vocals, mixing music, or streaming live content, a well-soundproofed space ensures your final product is clear and professional.
However, achieving the right acoustic environment in your home comes with challenges. Fortunately, most of them can be overcome with a proper mix of soundproofing and acoustical treatments. In the interest of clarity, this article is going to address soundproofing your space – reducing sound transmission into or out of the room. We can discuss proper in-room acoustical treatments, sound quality and reverberation issues another time.
Outside Noise Interference
Outside noise like traffic, neighbors, and sounds from other rooms can easily disrupt recordings without sound barrier solutions to keep them out.
Echo and Reverberation
Hard surfaces and poor room design create sound wave reflections that can muddy the sound in the final recording. Echo and reverberation reduction is essential for producing clean and crisp recordings. These types of issues will be addressed in a different article.
Sound Leakage
Without proper isolation, audio from inside the studio can bleed into other areas inside or outside the home and audio from these other areas can bleed into your studio.
This DIY guide will cover the essential materials, proven techniques, and step-by-step solutions for tackling these problems. Whether you’re just starting out or upgrading an existing setup, these steps will help you create a professional-sounding studio in your home.
Understanding Home Studio Soundproofing vs Acoustic Treatment
The first thing one must understand before embarking on a sound treatment plan is the difference between soundproofing and acoustically treating spaces. Put simply, soundproofing materials prevent sound from entering or leaving a room, and generally involve adding mass, creating airtight seals, and isolating surfaces to block or absorb vibrations. This is essential for minimizing external noise and preventing your recordings from disturbing others.
In contrast, acoustic treatment focuses on improving the quality of the sound within the room. It involves managing reflections, standing waves, and reverberations using materials like acoustic panels, bass traps, and diffusers. Understanding the difference between reducing/blocking sound transmission and improving sound quality in a room is extremely important, as products that block sound don’t help with sound quality within the space and vice versa.
| Soundproofing | Acoustic Treatment | |
| Purpose | Blocks sound from entering/leaving | Improves sound quality inside the room |
| Materials Used | Green Glue, RSIC-1 Clips, Mass-loaded vinyl, insulation, multiple layers of drywall | Acoustical panels, studio foam, bass traps, diffusers |
| Focus Areas | Walls, doors, floors, ceilings, HVAC | Corners, walls, ceiling reflection points |
| Best For | Reducing external noise | Enhancing recording/mixing clarity |
While both soundproofing and acoustic treatments are important, they serve very different purposes, and effectively treating a home studio will often require both.
Popular Home Studio Soundproofing Materials
Let’s begin by looking at some home studio soundproofing materials that are popular with musicians and content creators. These materials meet both the acoustic and aesthetic requirements of a professional or home studio.
- RSIC-1 Sound Isolation Clips: If your studio is still in the planning phase or if you have not yet added drywall to the studs, using the RSIC-1 sound isolation clip system on one side of the studs is one of the most innovative and highest performing products to be introduced in many years.
- Green Glue Vibration Dampening Compound:Green Glue is a very unique and worthwhile addition to any wall where soundproofing is needed. By dampening the resonance of the wall assembly, the sound pressure is greatly reduced from one side to the other. This is one of, if not the most effective ways to retrofit a wall to reduce sound transmission.
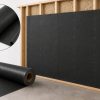
- Mass Loaded Vinyl (MLV): A dense, flexible barrier used to block airborne noise like voices, traffic, or neighbors. It is typically installed behind drywall and is highly effective when properly sealed.
- Multiple Layers of Drywall: The more mass and density a wall assembly has, the weaker the sound wave is once it gets through all that mass and density. This can be easily accomplished by simply adding multiple (two, three or more) layers of drywall to the studs. Many will also stagger the seams of the drywall as well as add acoustical sealant to make all joints as air tight as possible.
- Door Seals & Sweeps: Seals and gaskets that block gaps between doors and their frames, significantly reducing noise transfer. Automatic door bottom seals allow doors to operate normally and create a seal at the bottom when the door closes. We always recommend using the heaviest solid-core doors available as well and adding backer rod and sealant between door jambs and rough openings.
- Soundproof Curtains & Blankets: With an internal layer of mass loaded vinyl, Quilted Barrier Curtains are significantly heavier than traditional fabric-based curtains. Although they are too dense/heavy to pleat like a traditional curtain, they can be installed over windows or doorways to reduce sound transmission. If mobility is needed, a lateral roller track, similar to a track for a barn door, can be utilized to move the curtain out of the way.
Acoustic Geometry carries a wide range of materials that work wonderfully in home studios across these categories, including the RSIC-1 Clips, Green Glue, multiple options of mass loaded vinyl, adjustable door seals and quilted barrier curtains – along with other soundproofing products that may be an ideal fit for your studio.
How to Soundproof Your Home Studio (Step-by-Step Guide)
Home studio soundproofing involves a lot of steps, and it can get complicated if you don’t have a good roadmap. That’s why we have included this step-by-step guide to help make the process easier.
Assess Your Studio’s Needs
- Determine if your goal is sound isolation (reducing sound entering or leaving the space) or acoustic treatment (improving the sound quality within the room), or both.
- Consider the type of noise you are dealing with and where it may be coming into or leaving the room, or if sound quality is the main concern, what type of frequencies or decibel levels you are experiencing.
Identify the Weak Spots
- Doors – Hollow core doors and any and all air gaps/cracks under and around a door are always good to look for first and are a very common source of sound transmission into or out of a room. Check for and seal any and all air gaps and consider replacing hollow doors with solid core acoustic doors.
- Windows – Seal gaps and add secondary magnetic noise reducing windows or cover windows with quilted curtain panels if necessary. (Full frame replacement vs. inserts)
- Walls – May need additional drywall added to increase mass and density. Including a layer of Green Glue or floating drywall off of the stud with the RSIC-1 clips are great options when a high level of soundproofing is needed.
- Floors/Ceilings – Noise from other levels of the house may create noise issues. Increase ceiling soundproofing with the same methods mentioned above for walls, listen closely to potential sound coming through can or recessed lights. Adding rubber flooring underlayment to floors above studios can reduce some footfall.
- HVAC Ducts- Sound travels through air, so any and all common air spaces that connect two spaces are an easy path for sound to get from point A to B. Line ducts with cotton duct liner or install in-line duct silencers to allow airflow while reducing sound transmission.
Choose Between Budget-Friendly and Professional Solutions
- Find a balance between the performance you need and a price point your budget can handle. Budget-friendly options include solutions like DIY adjustable door seals and gaskets, weather stripping, soundproof curtains and rugs. Professional solutions include things like RSIC-1 Clips, adding layers of Green Glue between layers of drywall, decoupling walls, installing MLV onto studs before drywall is hung, or floating floors with rubber underlayments.
Apply Appropriate Solutions
Once you have identified the spots in your studio that require treatment, applying appropriate solutions will help to reduce or eliminate sound transmission and provide a better space for your recording projects. Let’s look at some of the most effective products for home studio soundproofing.
Floating Floors: Preventing Vibrations and Impact Noise
When your goal is total isolation, floating floors are a wonderful option for stopping impact noise and vibrations from traveling through a building’s structure. This is because a floating floor is decoupled from the subfloor, preventing sound transmission from passing from one surface to the other. Installing floating floors for studios is an essential component in home studio soundproofing, and can be tackled using a few different techniques.
Rubber Underlayments
One of the most common methods of creating floating floors is the rubber underlayment. Rubber underlayments are typically installed between the flooring layer and the subfloor, and effectively absorb impacts and vibrations.
Resilient Channels
Galvanized hat or resilient channel is typically used to decouple drywall from studs or joists.
Isolating Walls: Preventing Sound Bleed
A significant amount of sound can bleed through walls if they are not treated to handle it. The two primary ways sound passes through walls is either via direct transmission, which means the sound passes directly through thin or poorly insulated walls, or via flanking paths, where sound travels around the wall via adjacent structures like ceilings, floors, and ductwork. There are a couple great ways to prevent sound bleed in your studio walls.
Double-Wall Construction
If you have the space for a relatively thick wall assembly and the budget for two rows of studs for each wall in question, a double-wall construction is a really great option for building soundproof home studio walls. Building two separate rows of studs with a small air gap between them (and filled with insulation) ensures there is no physical connection between layers and no direct sound path. This is a highly effective option for home studio soundproofing but does take up more room space than a standard, single stud wall assembly.
Adding Mass and Damping
If you are looking for a simpler option or don’t have the room to lose with a wall assembly that is significantly thicker than a standard wall, adding materials that add mass and dampen sound can be a great option. Materials like Mass-Loaded Vinyl and soundproof drywall are not as effective as a double-wall system, but are still very effective sound barrier solutions.
Decoupled Wall Assemblies
If you are looking for pro-level soundproofing and want the most performance out of the thinnest wall assembly, consider something like the RSIC-1 clip system or a similar decoupled wall assembly. Clips like these float the drywall off of one side of the stud and break the hard surface contact that one side of the wall has with the other. These are truly great options for creating soundproof walls in home studios.
Soundproofing Your Ceiling: Blocking Noise from Above
In any multi-level home or office, unwanted noise from above can be a disruptive force. Footsteps, dropped objects, and HVAC noise can wreak havoc on home music production spaces and make sound mixing incredibly difficult. Ceiling soundproofing can take care of both impact noise and airborne noise. Here are some noise reduction measures that work.
Best Techniques for Soundproofing a Ceiling
- Add Extra Drywall with Green Glue: Sandwiching Green Glue between drywall layers dampens sound, dissipating vibrations as a small amount of heat energy, significantly reducing noise transfer. Make sure the structure is strong enough to support the added weight.
- Install Resilient Channels or Sound Isolation Clips: Both these systems decouple drywall from ceiling joists, helping prevent sound vibrations from passing through the structure.
- HVAC Duct Liner or Silencers: If you can get to the duct work, treating ducts for sound transmission can be one of the most worthwhile ceiling sound absorption steps taken in studio soundproofing.
Additional DIY Home Studio Soundproofing Tips
Beyond the solutions we have already looked at, there are some simple steps you can take to create a DIY recording setup that is free from external noise.
These are simple enough to install yourself, and none will break the bank.
Sealing Gaps
Using acoustic caulk to seal gaps and cracks around the perimeter of your window and door frames will add a layer of soundproof insulation that prevents sound leakage between the inside and outside of the studio. Oftentimes, this means removing window or door trim to seal the gap between the window/door frame and the rough opening (framing). Stuffing things like backer rod before sealant is added can reduce the amount of sealant needed to make an airtight seal.
Improved Doors & Windows
Lightweight, hollow-core doors and outdated windows can contribute a lot of sound bleed. Replacing insufficient doors with heavier studio doors is one of the most effective means of studio door soundproofing, and is easy to do yourself. Also, replacing those outdated windows with new double or triple pane windows can be effective, but may be prohibitively expensive. Installing acoustical window inserts is a budget-friendly option that blocks a lot of sound.
Read More:
Using Bookcases & Furniture
Furnishing your home music studio with bookcases and soft, absorptive furniture can help dampen reflections and diffuse sound waves, significantly improving recording studio acoustics and reducing the amount of ambient noise in the space.
Creating an Optimal Home Studio
Building a home studio that sounds professional and functions efficiently requires a strategic mix of soundproofing and acoustic treatments. By understanding how sound moves through structures and using the right materials to block, isolate, or absorb it, you can eliminate distractions, control room tone, and ensure your recordings are clean, clear, and consistent.
Here’s a quick recap of some of the key strategies for home studio soundproofing:
- Block outside noise using Green Glue, RSIC-1 clips, mass loaded vinyl, multiple layers of drywall, door seals, and double-wall construction.
- Isolate vibrations with floating floors, resilient channels, isolation clips, and ceiling decoupling.
- Treat room acoustics using bass traps, diffusers, acoustic panels, and creative furniture placement.
- Seal every gap and crack to prevent sound leaks – windows, doors, vents, and outlets all matter.
Whether you’re a musician tracking vocals, a podcaster capturing dialogue, or a content creator editing audio, a properly treated space will make your work stand out. While professional studios can cost thousands, DIY solutions using appropriate materials and proven techniques can deliver high-end results on a budget.
Whether you are creating a vocal booth with total sound isolation or mounting acoustic treatment materials to reduce room echo, Acoustic Geometry carries the professional products and has the experienced staff to make your home studio soundproofing project a success. Reach out for a consultation.


Add comment
You must be logged in to post a comment.