

Acoustic Hacks for Garage Studios: Turn Any Garage Into a More Creative Space
Garages are one of the most popular studio spaces among amateur musicians, podcasters, and creatives, and knowing a few good garage studio hacks can help turn an unfinished box into a rehearsal sanctuary, recording-ready space, or source of inspiration. But garages weren’t built with any kind of sound containment in mind. Most have concrete floors, unfinished or hollow walls, and thin garage doors with small gaps throughout and around the door and all of these lead to acoustic and soundproofing challenges.
In this guide, we discuss the most effective hacks for a fully functional and inspiring garage studio space.

Why Garages Are the Ideal (and Most Difficult) Spaces for DIY Studios
Garage spaces are a go-to for creators of all types. The primary reasons are the privacy, space, and separation they provide from family or roommate distractions. But they also create major acoustic challenges.
Key Advantages of a Garage Studio Setup
Building a home recording studio in garage spaces can be a cost-effective way to achieve independence and creative freedom but it isn’t always cheap, easy or straight forward – there are a lot of things to consider before you start. A well built and properly designed and treated garage music rehearsal space lets bands play at a fairly high volume without disrupting the household. Key advantages include:
- Privacy: Practice, record, or create without disturbing the rest of the household.
- Space: Often plenty of room for drum kits, guitar amps, recording, or podcasting setups.
- Inexpensive: Far cheaper than renting rehearsal, recording, or office space.
- Freedom to customize: Make the room as creative and inspiring as you like, with no need to decorate in “living room colors.”
Acoustic Issues to Overcome
Some acoustic issues to overcome in garage studios include:
- Concrete floors that reflect sound waves
- Bare walls without absorbing materials create flutter echo
- Thin and poorly sealed garage doors that don’t block noise (especially bass / low frequency energy) from leaving the space or outside noise from invading the space, for example, traffic and lawnmowers
- Temperature fluctuations from hot or cold weather can impact both comfort and gear

Step 1 – Identify Your Garage Studio’s Acoustic Challenges
Before you start adding insulation, sound treatments, and upgrades, we strongly suggest starting with an assessment. Effective garage studio soundproofing starts with addressing weak points like hollow walls and thin and poorly sealed doors that can lead to a lot of sound transmission into or out of the space. Other things to explore before you start are the hard, reflective surfaces all around you – hard ceilings, walls and concrete floors. Identify what areas and treatments are best for the acoustic challenges that your space currently presents.
DIY “Clap Test” & Initial Recording Test
One great way to quickly assess acoustic problems is to do the “clap test.” Clap your hands in the center of the room and listen for a ringing echo. If you hear it, you need to add absorbers or other treatments to reduce reverb.
Another option is to record a 30-second clip of vocals or instruments. Listening to the playback will help you identify boxy echoes, mic buzz, or muddiness.
External Noise Infiltration
It’s important to assess the outside noises that impact your space, as well as the potential locations where people in nearby spaces or buildings may be bothered by whatever you are doing in your garage. Assess and listen to spaces where sounds are coming in, such as vehicles on the road, neighbors in their homes, yard equipment, barking dogs, etc. Marking or noting the direction of external sounds helps you focus on those sides. These same spaces are also where sound is getting out of the space, so treating them will be accomplishing two tasks at once.
Garage Studio Upgrade Weak Points
Structural weak points like garage door seams (air and sound intruders), gaps in the walls, or unfinished and uninsulated walls are all important to identify. Thin and unfinished ceilings (exposed rafters) can also be a weak point in the room and allow a significant amount of sound both into and out of the space. Thin, single pane garage windows are not efficient sound barriers at all, so be sure to listen critically near windows as well.
Garage Door kits are used to reduce the vibration from the motor running from getting into the structure and the people above – they don’t do anything at all for reducing the sound that this article is referencing
Step 2 – Closing Off the Garage Studio Door vs. Keeping Access
The next big decision is whether you plan to permanently close off the garage door or not. For instance, installing soundproof curtains for garage setups helps reduce noise transferring into or out of the space while absorbing reverb inside the space as well. When installed with space transformation in mind, these curtains can be moved or relocated. If you are really looking to block a lot of sound, permanently closing off the garage door is a better way to go. Properly sealing a garage door for sound requires removing the garage door motor and rails, framing, insulating, drywalling and sealing off the opening for the garage door.
Option 1: Garage Studio Hacks to Retain Access
Another approach is to focus on creative soundproof hacks to maintain access and functionality of the garage space – specifically the main garage door that is opened and closed to allow vehicles to enter and leave the space. This is basically a necessity for multi-use or flexible garage spaces. Some of the easiest upgrades include DIY acoustic treatment for garage spaces, like hanging rugs, dense/heavy blankets or even rolling wooden gobo-type barriers in front of the garage door. Unfortunately these types of approaches have two major deficiencies. They do not eliminate the shared air space that your studio area has with the garage door itself and they do not typically add enough mass between the loud and the desired quiet areas to make an audible or noticeable reduction in volume. One of our favorite garage door soundproof solutions include acoustical curtains that can cover the entire garage door – yet also be removed fairly easily. Floor-to-ceiling quilted panels are one of the only true noise barrier options that allow you to slide or move the panels out of place when you need access to the garage with a vehicle.
Option 2: Closing Off the Garage Door
Insulating a garage for music with construction materials like studs, insulation, drywall and acoustical sealant is the most effective way to reduce sound transmission through the garage door and ultimately creates a more stable climate for longer and louder sessions. True and proper sound isolation in garage setups often requires some fairly robust changes to the wall assembly that often include products like RSIC-1 sound isolation clips and hat channel, dense barriers like Mass Loaded Vinyl (MLV), Green Glue vibration dampening compound between two layers of drywall and of course, fully and completely sealed seams.

Acoustic Treatment Garage Studio Hacks
Once you have the basic setup in place, focus on creative sound treatment solutions to improve the acoustics of the garage space.
Echo and Reverb Reducers
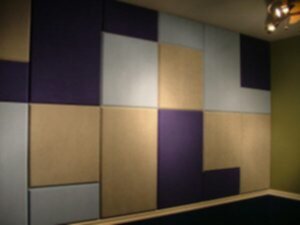
Recording vocals in garage spaces benefits from portable booths or strategically placed absorbers to cut reflections. To reduce echo in garage studios, prioritize absorptive wall panels and thick flooring materials. Hanging fabric wrapped panels on the walls can improve room tone. You can also use DIY acoustic treatments like Echo Eliminator or CFAB panels. For low-budget options, hang thick blankets or even rugs on the walls for sound absorption.
Bass Trap Garage Studio Hacks
Optimizing garage practice room acoustics means combining bass traps, absorbers, and diffusion for balance. For instance, controlling bass in small studio garages often requires corner traps and smart speaker placement to avoid muddiness. Here are some simple hacks to follow:
- Place CornerSorber® bass traps in the corners for low frequency management and to tame boominess
- Rearrange bulky furniture to the empty corners where acoustic panels don’t fit
- Install modular acoustic panels for garage studios to give you the flexibility to adjust as your needs evolve
Floor Acoustic Garage Studio Hacks
The best flooring for garage studio designs mixes rugs with acoustic flooring underlay to absorb vibration and add warmth. In addition, vibration isolation squares can help to reduce the hard contact that things like cabinets and speakers have with the concrete. Finally, a floating floor for music studio garages helps block vibration from nearby roads and isolates instruments.
Ceiling Garage Studio Hacks
Here are a few recommended garage studio hacks for hanging from the ceiling:
- “Clouds ”suspended from the ceiling to absorb noise
- Diffusers help with flutter echoes if the ceiling of the space is drywalled
- Adding simple acoustical panels directly onto the ceiling such as Fabric Wrapped Panels, Wood Wool or Poly Max can reduce overall reverb, echo and help to tune the room. Some of these materials offer thermal as well as acoustic benefits

Garage Studio Comfort and Climate Upgrades
Creating the right climate is also an important consideration for your garage studio setup. Uninsulated garages have their own set of challenges.
Garage Studio Couch Upgrade
Adding a fabric couch or other soft seating can make the space more inviting as well as reduce echo in the garage.
Temperature Control Garage Studio Upgrades
Garage walls can be insulated using standard fiberglass or mineral wool insulation or rigid insulation board. Climate control for garage studio setups may include heaters, portable AC units, and baffled vents for airflow without noise.
Ventilation Garage Studio Hacks
Noise-free ventilation is another consideration. Baffled vents or insulation that allows airflow but reduces noise is an option. Insulated ducting for fans and smart placement of HVAC units away from recording or creating areas can help to reduce noise.
Troubleshooting Common Garage Studio Sound Issues
Even with the above tips, you may still encounter sound issues in the garage space. Here are some common challenges and quick solutions.
| Problem | Likely Cause | Quick Fix |
| Hollow “boxy” sound | Bare parallel walls | Add absorbers, diffusers, Pro Packs or Room Packs |
| Low-frequency rumble | Road vibration | Floating floor, Isolation Squares or Drum Mat isolation pads |
| High noise bleed | Thin garage door or walls | RSIC-1 clips, Green Glue, Mass loaded vinyl or quilted curtain panels |
| Echo during vocals | Reflective walls | Fabric-wrapped panels or curtains |
| Mic buzzing | Electrical hum | Reroute cables, use power conditioners |
Final Garage Studio Touches to Personalize and Inspire
Once the sound treatment is set, you’ll also want to get creative with the space. Here are some design considerations to inspire and personalize the space.
Creative Lighting and Acoustic Treatment
Lighting that doubles as acoustic treatment is one popular option. Fabric-wrapped LED panels can soften light and reduce sound reflections. Diffuser-style lighting is another option for even sound distribution.
Garage Studio Decor Upgrades
Wall art and acoustic-friendly tapestries or fabrics are another way to get creative. Colors and textures that inspire and enhance creativity are important design elements. It can also help to include a dedicated space or arrangement to optimize creative workflow, from ergonomic furniture to stage set-up for jam sessions.
Designing a jam session setup with seating, amps, and lighting makes the garage feel like a stage-ready space.

Conclusion
Garage studio hacks offer creative solutions to overcome the challenges presented by garage spaces. With the right upgrades and ideas, you can turn a noisy, empty concrete box into a soundproof and inspiring space. Start by soundproofing your garage door and installing bass traps and room packs. Floating floors are another great option if vibration is a concern. In addition to sound and acoustics, creative lighting, décor, and climate solutions also play a role in the quality of the overall space. With a few smart garage studio hacks, you can go from an echo chamber to a recording-ready space in no time.
Check out some DIY garage studio hacks from Acoustic Geometry, including DIY acoustics advice for musicians, podcasters, and audio creators. Our modular panels, door soundproof kits, and acoustic flooring solutions are all customized solutions you can consider when making the transformation from concrete box to recording-ready space. Inspired and want to take the next step? Contact us today. We’d love to help get your garage studio ready for recording vocals, live jam sessions, podcast editing, or whatever audio creation you have in mind.

About author










Add comment
You must be logged in to post a comment.