8 Tips for DIY Acoustics Projects
Looking to take on a DIY acoustic project at your home that doesn’t involve tearing down walls or draining your wallet? Whether you’re a renter, a musician fine-tuning your studio, or a remote worker upgrading your home office, achieving better sound can be done with your own two hands, meaning you don’t need to hire the professionals or undergo massive costly renovations. In fact, some of the best DIY acoustic solutions are simple, stylish, and completely doable with basic tools and a little creativity.
Poor acoustics can impact everything in your home, from the quality of your recordings and video calls to your sleep and even your ability to focus. That’s why we’ve created this list of eight smart, accessible, and affordable soundproofing ideas you can start today. But before diving into the tips, check out this quick video that introduces the foundational concepts of room acoustics and treatments.
Tip 1 – Address the Obvious Culprits (Reflective Surfaces)
If you’re wondering how to reduce echo in a room, start by determining the sound-reflective surfaces. Sound naturally bounces off hard, flat materials like bare walls, hardwood floors, ceilings, and even large windows. This can all create harsh echoes and muddling clarity in untreated spaces, especially when on video calls, music playback, or just having everyday conversations.
To soften and absorb those sound waves, try using more tactile materials in your space:
- Lay down thick area rugs or carpets on hard flooring
- Choose fabric-upholstered furniture instead of leather or wood finishes
- Add cushions, throws, or fabric room dividers to break up large, reflective surfaces
Soft, absorbent materials help trap sound waves and reduce reverberation, making the space noticeably quieter and more comfortable. These easy acoustic upgrades are perfect for beginners and renters alike who want results without construction and no hit to their wallets.
Learn more about the steps to take to create an acoustically optimized environment in your home.
Tip 2 – Use Wall and Ceiling Panels for Targeted Absorption
Once you’ve tackled the soft furnishings and other basic sound reflections, it’s time to take your space to the next level with acoustic wall panels. These specially engineered panels offer targeted sound absorption helping to reduce flutter echoes, excessive reverb, and that hollow room “ring” that can interfere with everything from casual conversations to high-quality audio recordings.
We recommend the following two options:
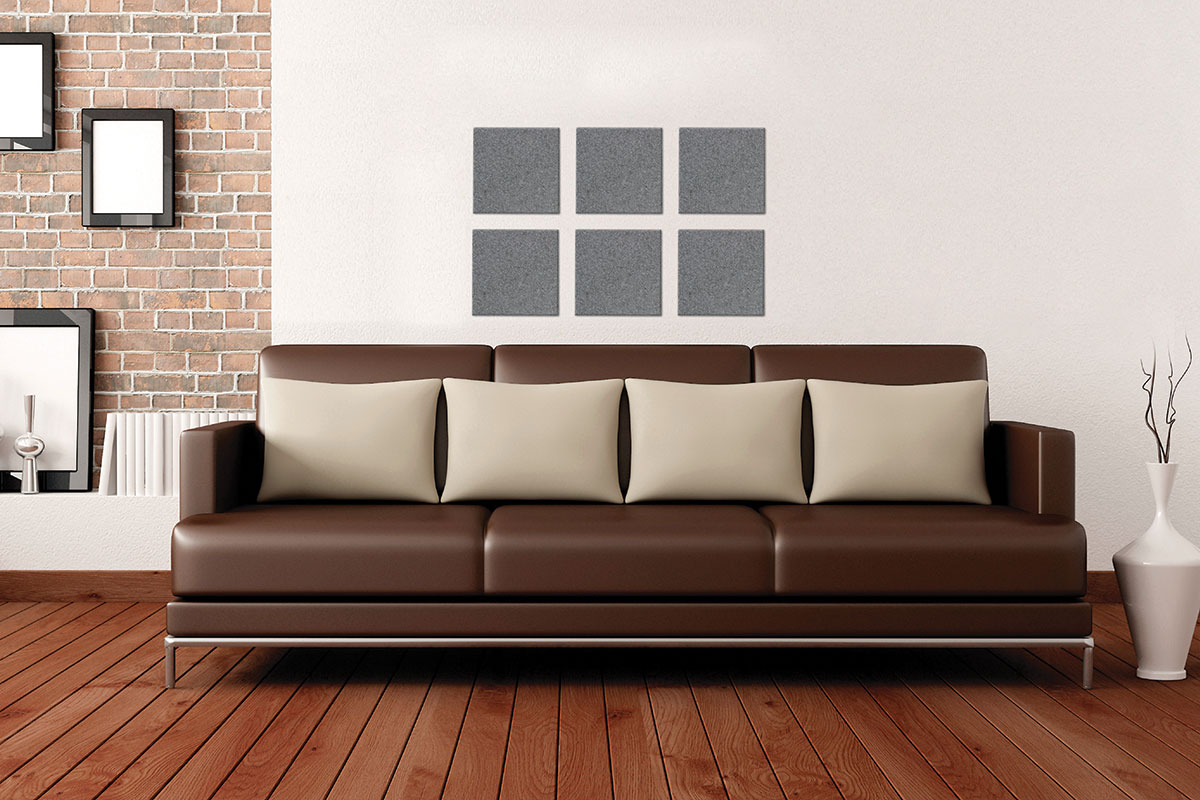
- Fabric Wrapped Panels: Available in multiple colors and sizes, these classic panels blend seamlessly with décor and are easy to install. They’re designed to absorb mid- to high-frequency sound and are simple and easy to mount.
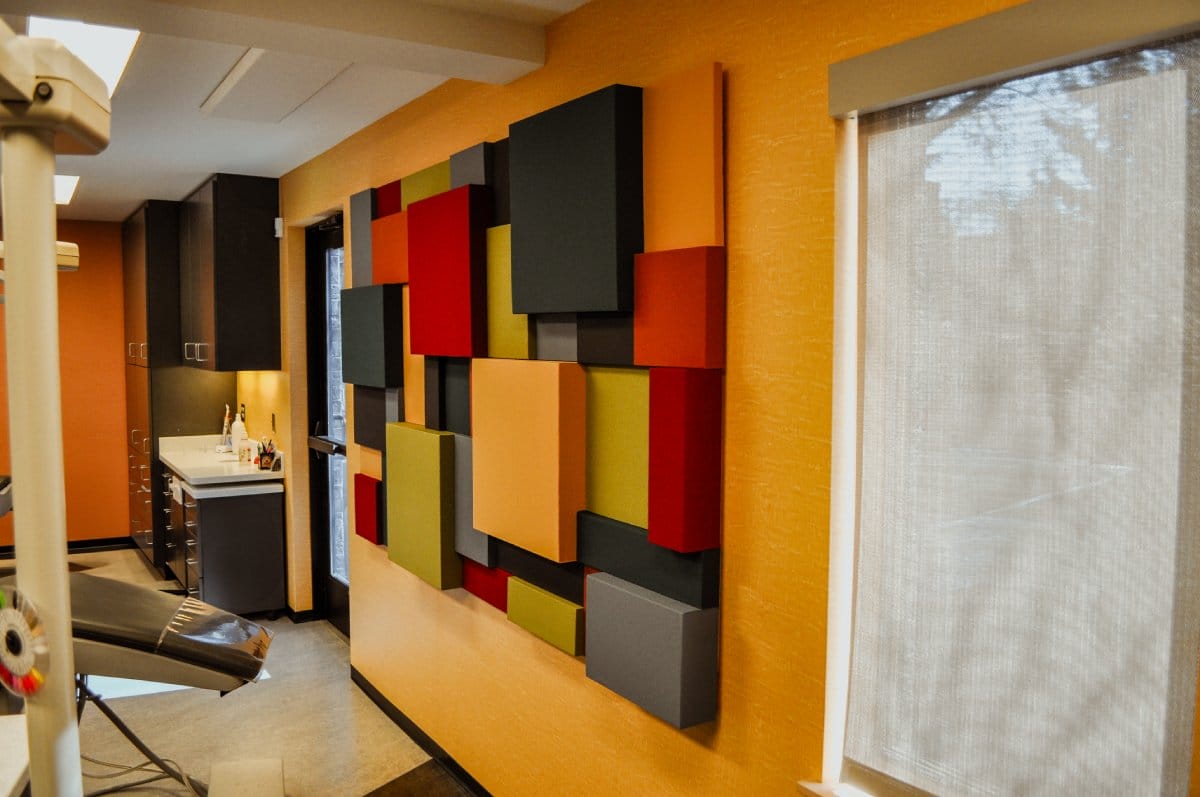
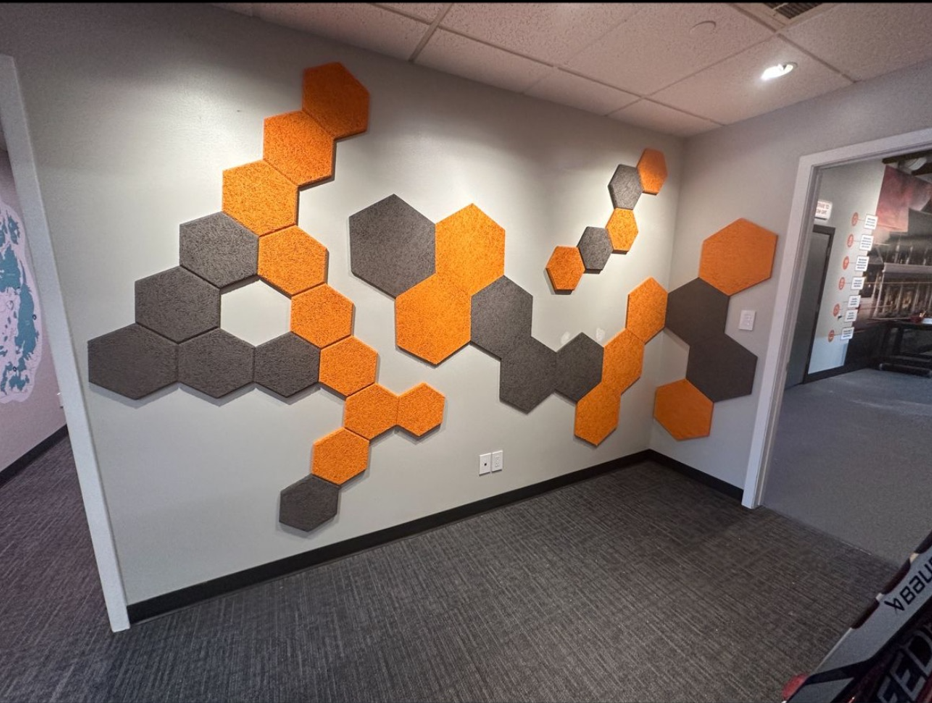
- Acoustic Wall Art: These dual-purpose panels combine professional acoustic performance with stunning visuals. They offer the same sound control benefits while enhancing your room visually, making them perfect for living rooms, offices, and creative spaces.
Both of these wall-mounted options are ideal for acoustic treatment for home theaters, recording spaces, or living areas, and since they’re non-permanent, they’re renter-friendly, too. And if you do end up moving, they’re a great solution as they’re a commitment-free upgrade. With just a few strategically placed panels, you can turn your space into a more focused, professional-sounding environment.
Tip 3 – Seal the Door to Block Sound Leakage
Think of your door as a potential hole in your acoustic setup since it’s essentially a hole through which sound can easily pass. Even small gaps around the doorframe or under the door can let a surprising amount of sound in or out, whether it be hallway chatter or the hum of household appliances. If you’re working in a home office or music studio, sealing this space can make a big difference.
Fortunately, our solution is the door seal kit. It’s an easy and affordable DIY install solution that creates a tight barrier around your doorframe which helps to cut noise transfer and improve privacy. Once installed, the door seal kit significantly reduces noise transfer between rooms, helping to maintain focus during meetings or improve sound recording during vocal takes.
In fact, door sealing is one of those soundproofing tips that delivers a big return for minimal effort and cost, so we suggest giving it a go. It’s fast, renter-friendly, and doesn’t need any special tools or construction know-how. And of all the soundproofing tips out there and in this guide, sealing the door gives you one of the best returns on effort and cost, making it a no-brainer for anyone looking to enhance their acoustic environment without making permanent changes.
Tip 4 – Upgrade Window Insulation Without Losing Light
While blackout curtains can help muffle sound, they also have an obvious drawback in that they block out natural light. This isn’t ideal for your home office or bedroom and isn’t an ideal tradeoff for quieter surroundings. Instead, try acoustic window inserts.
Climate seal window inserts are a sleek, low-profile solution to insulate your windows from unwanted noise.
They are designed to:
- Maintain your view and allow sunlight to shine through
- Provide a thermal and acoustic barrier against noise, temperature swings, and drafts
- They are nearly invisible once installed which means they blend seamlessly with your existing window frame
If wall soundproofing and door sealing are the first steps, window treatment is the next frontier, especially if you live near traffic, barking dogs, or noisy neighbors.
Tip 5 – Add Pro-Grade Acoustic Treatments as a DIYer
If you choose to go the professional-grade route, just know that these solutions aren’t just for high-end studios anymore. Thanks to smarter designs, many are optimized for DIY acoustic projects. Here are a few we love:
- Curve Diffusors: Balance sound in your space by scattering rather than absorbing it.
- AcoustiBlox Iso Squares: Minimize vibrations between your gear and the floor, making them perfect for subwoofers or music equipment.
- Room Packs: Pre-configured kits that provide complete studio acoustic treatment for various room sizes.
These tools can really enhance your room’s performance, and the best part, you don’t need a contractor to use them!
Tip 6 – Use PolyGrille Slat Panels for Style and Sound
Want to make your space stand out both visually and acoustically? We suggest PolyGrille slat panels as the perfect solution.
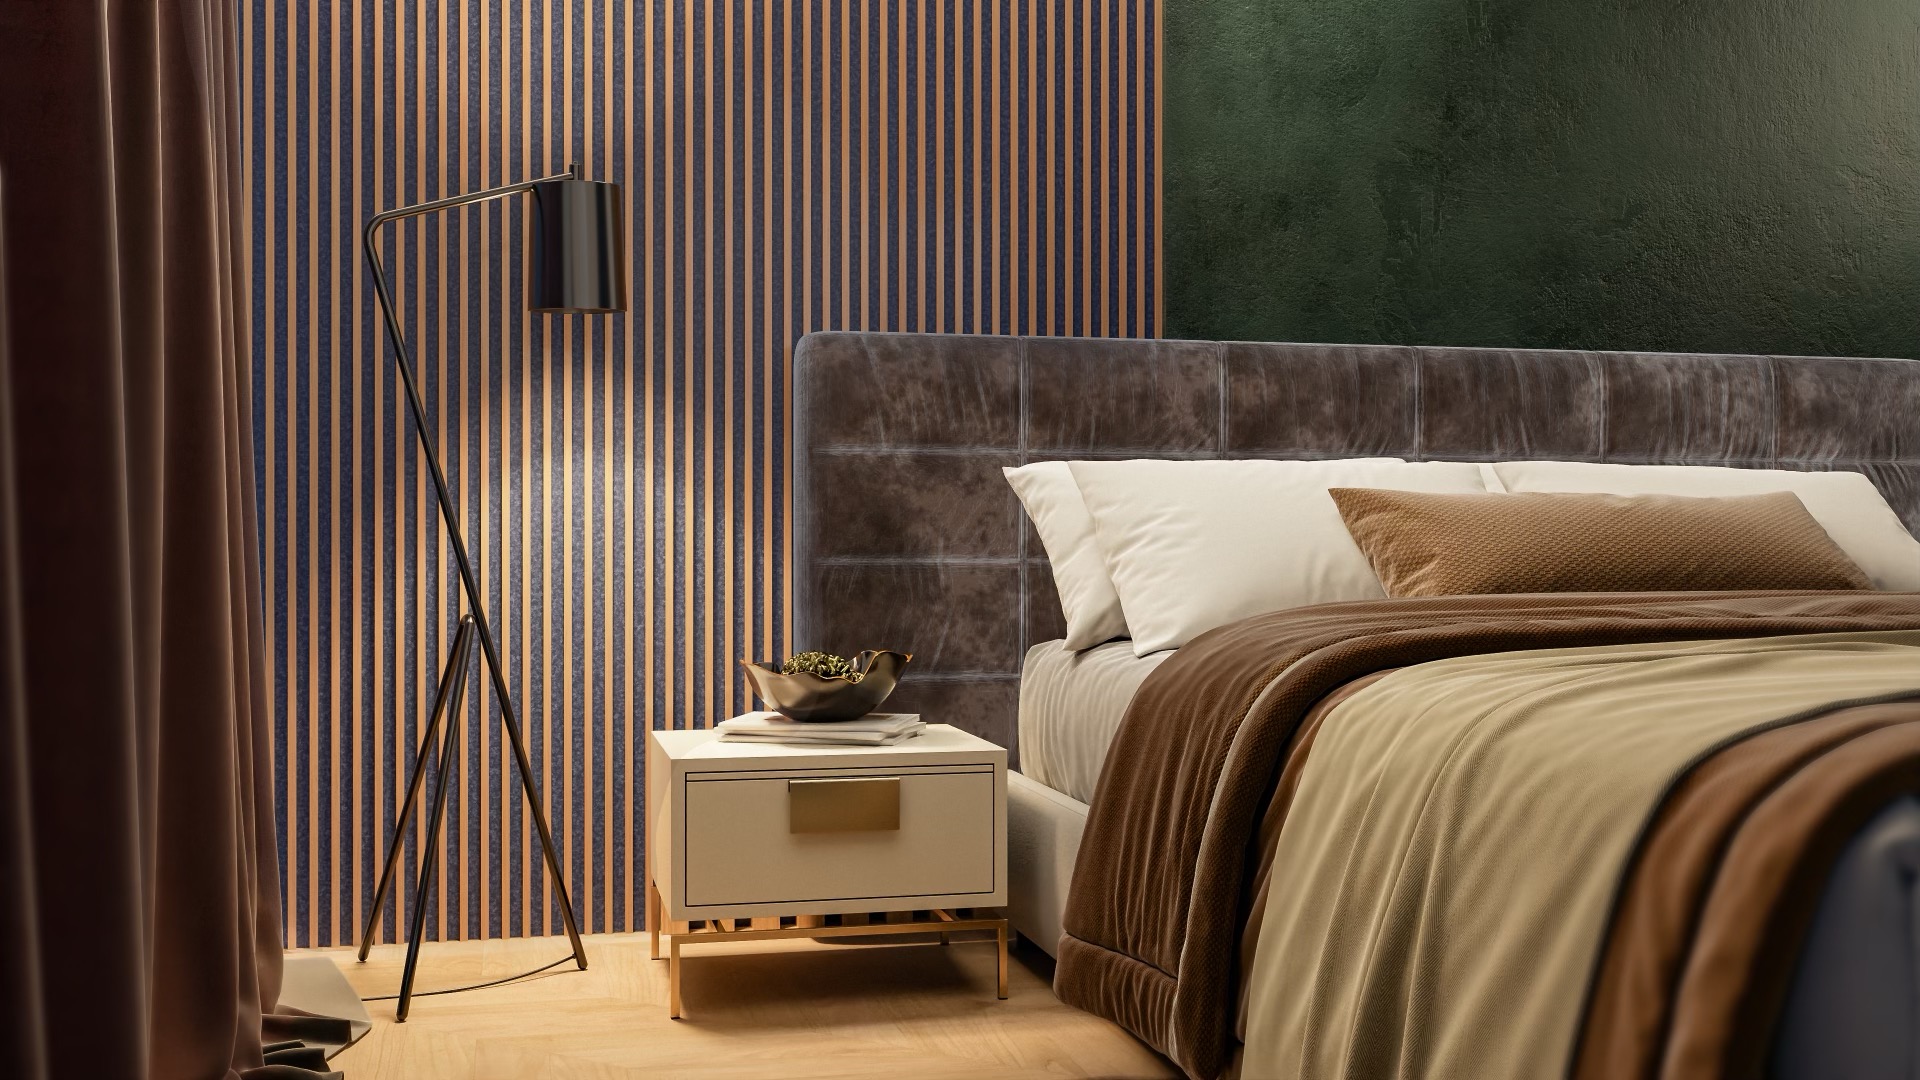
These elegant, wood-look acoustic slat panels:
- Add warmth and sophistication to any wall
- Absorb sound through built-in acoustic backing
- Are ideal for small to mid-sized spaces like home offices, living rooms, or studios
PolyGrille slat panels are a simple way to upgrade both your décor and your acoustics at the same time without any compromise needed.
Tip 7 – Install Sound Silencer Panels in Utility Areas
Utility spaces like garages, home gyms, or workshops often have concrete walls and ceilings that reflect sound harshly. Traditional foam panels which are often used in residential settings may break down or degrade quickly in these environments due to temperature swings, moisture, and wear, so we don’t suggest using them.
Instead, this is where sound silencer panels shine. These durable, washable panels are specifically engineered for durability and performance and are built to withstand the demands of high-use areas. They are:
- Impact-resistant making them perfect for busy spaces where bumps, tools, or equipment might hit the wall
- Mold- and mildew-resistant ensuring they hold up well in humid and damp environments like utility rooms or basements
- Easy to mount with Z-bars (minimal wall damage required)
Sound silencer panels are a smart, long-term wall soundproofing solution for high-use, high-noise spaces.
Tip 8 – Treat the Floor to Reduce Impact Noise
Don’t forget the floor! It’s one of the biggest contributors to unwanted sound, especially in multi-level homes or apartments. Footsteps, dropped items, and music vibrations can all travel easily through flooring.
To combat this:
- Use a drum mat in practice or recording spaces to reduce vibration from drums or gear
- Try acoustic flooring underlay for whole-room floor soundproofing that dampens structural noise
Floor treatment isn’t always the first step in a DIY acoustic project, but it can complete the setup and deliver total sound control.
Conclusion
You don’t have to be an acoustician or spend thousands of dollars to build a quieter, clearer-sounding space. With the right mix of fabric-wrapped panels, door seal for sound, acoustic window inserts, and sound diffuser panels, even beginners can achieve professional results.
So if you’re building a home studio, designing a peaceful office, or just trying to reduce echo in a room, these DIY acoustic projects are a smart starting point.
Check out more affordable soundproofing ideas and acoustic solutions from Acoustic Geometry, including Aco-U-Stick panels and other pro-grade, DIY-friendly options.
With Acoustic Geometry’s help, every room can sound its best, plus the job can be done beautifully, affordably, and without a single renovation crew in sight.
Ready to get started on your own DIY acoustic project? Browse our complete collection of solutions at Acoustic Geometry.


Add comment
You must be logged in to post a comment.